Saturday, December 29, 2012

Ceating Teams in VMWare Workstation 8 and above

If you used to create VMWare Teams in versions of VMWare Workstation prior to version 8, you will notice that this feature is now missing in versions of VMWare Workstation 8 and above.


Instead, you can achieve similar functionality through the creation of folders to group associated virtual machines:

http://blogs.vmware.com/workstation/2011/10/what-happened-to-teams.html

Wednesday, November 21, 2012

SharePoint 2013 Environment Configuration

When setting up a SharePoint 2013 Environment, you will have to set up a virtual machine as an Active Directory Domain Controller as well as the actual SharePoint 2013 Server.  Whereas this was not a requirement in earlier versions of SharePoint (such as SharePoint 2010), the new architecture of SharePoint 2013 requires components such as the Workflow Manager and the Windows Azure Service Bus require the separation of these server responsibilities.

In addition, if you are using virtualization to set up your SharePoint Development environment infrastructure, you will need to allocate approximately 10-12 GB for the SharePoint Server (Single Server Installation) as well as the recommended amount of memory for an Active Directory Domain Controller (depending on the guest OS).

If you are using automated build scripts such as AutoSPInstaller (http://autospinstaller.codeplex.com/) or the corresponding GUI for this set of PowerShell Scripts (http://autospinstallergui.codeplex.com/), then you will also need to join the virtual machines to an Active Directory domain since the scripts currently do not support standalone/local installations of SharePoint.

For a review on how to set up 2 or more virtual machines that are joined to a domain, you can review this earlier blog post: http://samirvaidya.blogspot.com/2012/05/joining-2-or-more-virtual-machines-to.html

If you want a detailed installation and configuration guide for SharePoint Server 2013, you can download a copy of such a guide from here: http://criticalpathtraining.com/Members/Pages/default.aspx

Monday, November 19, 2012

Tip to always remember when working with PowerShell

I work with PowerShell frequently on a variety of computers as well as virtual machines and whenever I work on a different machine, one of the most common tasks I always forget to accomplish is to change the Execution Policy in the PowerShell window:

Using the Set-ExecutionPolicy Cmdlethttp://technet.microsoft.com/en-us/library/ee176961.aspx

The safest policy to follow is to set the ExecutionPolicy to RemoteSigned, however, in some cases, the ExecutionPolicy may also be set to Unrestricted.  


Multiple connections to a server or shared resource are not allowed

When mapping a network drive, if you receive an error message similar to the following: "Multiple connections to a server or shared resource by the same user, using more than one user name are not allowed", you may find the following Microsoft support article describing possible solutions to the problem: http://support.microsoft.com/kb/938120

However, this solution is a bit difficult and tedious, but fortunately, there is a readily available improved solution to this problem.  You can simply use the following command:

net use * /delete

This command will list out all of the available network connections for deletion. After reviewing all of the current network connections, you can confirm any network connections to delete.  Once these have been deleted, you can then re-establish the network connection with the appropriate user credentials!

Saturday, November 17, 2012

Deploying Custom User Controls for Sitefinity

If you ever have to deploy custom User Controls to Sitefinity that are written in Classic ASP.NET (not ASP.NET MVC), below are the following steps to accomplish this:

  1. After creating the project using Sitefinity Project Manager, open the project using Visual Studio 2010 or Visual Studio 2012
  2. By default the Visual Studio project will have a name of SitefinityWebApp
  3. After the project has been opened in Visual Studio, create a folder in the Visual Studio project to house the User Controls that you will be creating such as "UserControls"
  4. Add an ASP.NET User Control to the folder
  5. Begin developing the content that you want to add to the User Control
  6. Compile the SitefinityWebApp Visual Studio project using the Build option.  NOTE: If you use the Rebuild option, you will end up deleting unreferenced assemblies in the project thus causing additional problems with the deployment
  7. After compiling the project, you will have to register the control in the Toolboxes section in Advanced Settings
  8. After the control has been registered in the Toolboxes section, you should be able to open a Sitefinity Content Page and add the User Control as a Widget to the Page
  9. After publishing the Sitefinity page, you should be able to view the resultant page
  10. If you are then deploying this content to a hosted server for a fresh installation, you will have to do the following:
    1. Deploy the entire contents of the local directory structure
    2. If necessary, change the database connection string to provide the appropriate database credentials on the target hosting server
  11. If you are deploying changes to a hosted server, the steps you will have to follow differ slightly:
    1. Deploy any changes that were made to the local directory structure (such as the creation of the User Controls directory).  Any code behind files are not required, only the .ascx source code which contains the presentation code.
    2. Register the appropriate User Controls in the Toolboxes section of the Advanced Settings
    3. Deploy the SitefinityWebApp.dll to the bin directory on the target hosted server
    4. Add the widget to the appropriate Sitefinity Content Page and verify that the widget is working as expected

Monday, October 29, 2012

Unattended installation of Windows 8/Windows Server 2012

In case you are interested in performing an unattended installation of Windows 8 or Windows Server 2012, here is a very good article describing the entire process including screenshots:

http://derek858.blogspot.com/2012/07/windows-server-2012-unattended.html

You can download the Windows ADK from here: http://www.microsoft.com/en-us/download/details.aspx?id=30652

It is a setup file which will download the remaining files over the Internet.  You can also have it download the files for a later offline installation.

Once the Windows ADK is installed, you will use the Windows System Image Manager to create the answer file as you did with Windows Server 2008 R2 and Windows 7. 

Unfortunately, the Windows 8 and Windows Server 2012 answer files are significantly different from the Windows 7 and Windows Server 2008 R2 answer files, so there will be a learning curve and some trial and error with the answer file settings once again...

Here is the online Technical Reference for the Windows ADK: http://technet.microsoft.com/en-us/library/hh825039.aspx

This is the specific reference guide for Windows System Image Manager in regards to creating and opening an Answer File: http://technet.microsoft.com/en-us/library/hh825114.aspx

You can find a copy of the CHM file on your file system when you install the Windows ADK here: C:\Program Files (x86)\Windows Kits\8.0\Assessment and Deployment Kit\Docs\Unattend.chm

You can find more information about the Windows ADK Documentation here: http://msdn.microsoft.com/en-us/library/windows/hardware/hh825613.aspx

NOTE: I learned an interesting fact/quirk about the Autounattend.xml file.  Even if the default setting is Enabled in the Answer file, unless you change the setting to Disabled and then Enabled so that Windows System Image Manager displays it in bold, the validation error messages will not disappear!

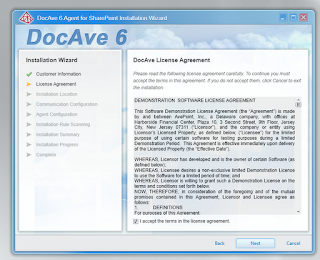
Installing AvePoint DocAve 6

If you have installed AvePoint DocAve 6 from the installation documentation, you may have noticed that the documentation lacks screenshots for many of the installation steps, thus making it difficult to read and follow.

Fortunately, I have captured the overall installation and configuration process that I can share with you below:

The installation consists of a DocAve 6 Manager Installation followed by a DocAve 6 Agent Installation.


In order to log into the system, you will launch a Web Browser that uses a Silverlight plug-in:


The default login name and password is admin/admin.

SharePoint 2013 and Office 2013 Released on MSDN!

SharePoint 2013 and Office 2013 RTM were released on MSDN!

You can download the RTM releases here: http://msdn.microsoft.com/subscriptions

Sunday, October 21, 2012

Adding jQuery Mobile support to a Sitefinity Content Page

If you are using a version or edition of Sitefinity that does not include the Mobile Device Support, odds are that you will need to leverage jQuery Mobile in your Sitefinity website in order to provide mobile device support.

Fortunately, this is a bit tricky but not that difficult overall:


  1. Open up your Sitefinity content page for editing
  2. Go into Title & Properties and add the following meta tag to the Advanced Options-->HTML Included in the <head> tag section: <meta name="viewport" content="width=device-width, initial-scale=1">
  3. Save your Changes
  4. Go back into Page Edit mode so that you can drag widgets into the Sitefinity Page
  5. You will need to add a CSS Widget and 2 JavaScript Widgets
  6. For the CSS Widget, link to the location of the jQuery Mobile .min.css file
  7. For the 1st JavaScript widget, link to the location of the jQuery .min.js file
  8. For the 2nd JavaScript widget, link to the location of the jQuery.mobile.min.js file
  9. Publish your resultant page
  10. View your published page and check to see if the rendering of the content in a mobile device has been improved


Sunday, October 7, 2012

Building and customizing styles for Sitefinity RadControls

If you are currently using Sitefinity CMS, you may already know that Sitefinity uses the Telerik RadControls for much of the ASP.Net content.

Therefore, if you want to customize the styles used in Sitefinity CMS, as in ASP.NET, you will need to skin the controls.

Fortunately, Telerik has made this process relatively easy through use of the Telerik Visual Style Builder:  http://stylebuilder.telerik.com/

You can customize an existing skin and then export it for use within your Sitefinity CMS Website!

Once you have the resultant styles, you can do the following:

  1. Upload the resultant styles into the App_Themes directory
  2. For the specific RadControl that is being targeted (such as RadMenu), open the Design Settings in Sitefinity
  3. Specify the name of the generated Skin in the Design Settings for the control
  4. Save your changes
  5. Verify that your Skin changes have been applied to the control

Saturday, October 6, 2012

Beware of Rebuild operations in Visual Studio with SitefinityWebApp

I was recently modifying a Sitefinity Web Application project, and as I so often do, I performed a "Rebuild" operation in Visual Studio.

Of course, as soon as I did this, I began getting assembly loading errors.  I could not figure out the root cause of the problem since my Sitefinity Web Application projects seemed to be running just fine!

Well, after some further research, I discovered that many of the assemblies/DLLs in the bin directory of the Sitefinity Web Application project are not referenced!

Therefore, performing a "Rebuild" effectively cleans out the bin directory of any unreferenced assemblies.  By natural consequence then, I would received assembly loading and assembly reference errors for any assemblies that no longer exist in the bin directory.

The solution??--just perform a "Build" and avoid the more common and conventional "Rebuild" operation in Visual Studio.  You could, of course, create Visual Studio references for all of the necessary assemblies and make "Copy Local" is true, but that might be more trouble than it is worth.


Tuesday, October 2, 2012

Default number of sections in InfoPath Repeating Control

As many InfoPath developers know, using an InfoPath Repeating Section control allows end-users to add additional sections as needed.

However, how do you add a default number of sections in an InfoPath Form.

Well, the answer is surprisingly easy:


  1. Open up your InfoPath Form
  2. Click on the Data tab 
  3. Click on the button for Default Values
  4. Expand the field containing your Repeating Section
  5. Right click on one of your existing sections
  6. You will now see a menu option to add additional repeating sections above or below the current section
  7. You can simply repeat steps 5 & 6 depending on how many "default" number of sections you want in your InfoPath Form.


Thursday, September 27, 2012

Installing Windows from a USB drive

Have you ever wanted to install Windows 7 (or Windows 8) from a USB Flash drive rather than from DVD media?

If so, Microsoft has a tool to meet your needs!

You can download the Windows 7 USB/DVD Download Tool which simply takes the contents of an existing DVD or an ISO image and push the content onto a USB Drive.  You can then boot from the USB drive and completely install Windows 7 or Windows 8!!  No DVD media required!  How cool is that???

You can download the tool from the Microsoft store from here: http://www.microsoftstore.com/store/msusa/html/pbPage.Help_Win7_usbdvd_dwnTool

Friday, September 7, 2012

Configuring ADFS v. 2.0 on Windows Server 2012

With the release of Windows Server 2012, ADFS v. 2.0 is now built into the OS.  You can simply add ADFS v. 2.0 by adding roles/features through Server Manager.

However, you will notice that the ADFS v. 2.0 Configuration Wizard has been slightly updated and refreshed with the release of Windows Server 2012.

Screenshots from the updated ADFS v. 2.0 Configuration Wizard in Windows Server 2012 are below:


Thursday, September 6, 2012

Problems while installing SharePoint 2010 on Windows Server 2012 RTM

I was recently following the following article in order to install SharePoint 2010 SP1 with June 2012 CU on Windows Server 2012 RTM:  http://blogs.msdn.com/b/bedwards/archive/2012/08/21/sharepoint-2010-on-windows-8-rtm-with-sql-server-2012-rtm.aspx

However, I came across an error message after running the SharePoint Product Configuration Wizard:


So, I first looked at my IIS configuration in IIS Manager and noticed that despite setting the default .Net Framework version in IIS Manager, my Application Pools were still created with .Net 4.0 compatibility.  So, of course, I had to change them back to .Net 2.0 compatibility:


I was then doing some more digging around in IIS and I found this setting:


 So it looked like the Application Pool Defaults were separate from the .Net Framework version defaults!!

So, of course, I looked at the Application Pool Defaults and sure enough, they were set to .Net 4.0:


In order to make sure everything would work correctly, I changed the Application Pool default .NET Framework version to v2.0:


After making those changes, my SharePoint Product Configuration Wizard was successful!!


Wednesday, September 5, 2012

Welcome improvements to managing Self-Signed Certificates in IIS 8

One of the pain points in IIS 7 and IIS 7.5 has always been using Self-Signed Certificates with DNS names. By default, the Self Signed Certificates always assigns the default host name for the Self-Signed Certificate.  In order to get around this limitation in the Self-Signed Certificate Wizard in the past, we have had to use Self SSL 7.

However, with the release of IIS 8 on Windows 8/Windows Server 2012, this limitation has been removed. You can now generate an SSL Certificate with a specified domain name and then bind the appropriate hosting Web Site with the matching domain name in order to be able to leverage that Self-Signed Certificate.


Tuesday, September 4, 2012

Naming and grouping Tiles in Windows 8 and Windows Server 2012

One thing that I have to say for the overall design of Windows 8 and Windows Server 2012--it is NOT intuitive!!

I wanted to try and create a named grouping for all of my Start menu Tiles and I could not figure out any OBVIOUS way to accomplish this!!

Thank goodness for Google! Whew!

Fortunately, I found this article which describes this process very clearly:

http://www.addictivetips.com/windows-tips/create-name-app-groups-on-windows-8-start-screen/

This process seems so unintuitive and difficult that I just don't understand how this got missed in a usability study of Windows 8....


Windows Server 2012 RTM released on MSDN!

Windows Server 2012 RTM is now available for download from MSDN!

http://msdn.microsoft.com/subscriptions

In addition, Visual Studio 2012 developers out there will be pleased to know that Visual Studio 2012 RTM installs successfully on Windows Server 2012 RTM!!


Monday, September 3, 2012

VMWare Workstation 9 now fully supports Windows 8

If you have had trouble with installing Windows 8 or Windows Server 2012 using VMWare Workstation 8.x in the past, fortunately VMWare has just recently released VMWare Workstation 9!!


VMWare Workstation 9 offers full support for Windows 8 and partial support for Windows Server 2012.  It also has significant performance improvements over its predecessor--Workstation 8.

Check it out--it is well worth the upgrade!!

Saturday, September 1, 2012

The Microsoft.ACE.OLEDB.12.0 provider is not registered on the local machine

I was recently using SSIS (SQL Server Integration Services) in SQL Server 2012 to attempt to import an Excel spreadsheet into a SQL Server database table, when I encountered the following error message:


After doing a bit of further research, I discovered an article which pointed to this download:

So after installing the Microsoft Access Database Engine 2010 Redistributable (I installed the 32-bit version), I was able to successfully import my Excel spreadsheet using SSIS!!


Thursday, August 23, 2012

Installing .Net 3.5 on Windows 8

If you have recently downloaded and installed Windows 8 RTM, you may begin finding applications that require the usage of .Net Framework v. 3.5.

Unfortunately, unlike its predecessor--Windows 7, Windows 8 ships with .Net v. 4.5.

Well, that poses a bit of a problem because of the new installation infrastructure that was implemented with Windows 8 whereby the installation media/installation source is required when installing any additional Windows features.  This new mechanism of installation is called DISM and you can read more about it herehttp://technet.microsoft.com/en-us/library/hh824821.aspx

If you encounter and read this article regarding DISM and .Net 3.5, you will see that it primarily addresses the issue in Windows Server 2012 and only provides a cursory overview of how to solve it in Windows 8: http://blogs.technet.com/b/askcore/archive/2012/05/14/windows-8-and-net-framework-3-5.aspx

The key to installing .Net 3.5 on Windows 8 actually lies in the first few steps:

  1. Open up gpedit.msc
  2. Edit the Group Policy under Computer Configuration-->Administrative Templates-->System
  3. Open the policy for Specify settings for optional component installation and repair.
  4. Specify an alternate source file path for the files (preferably a file path directly to the ISO image/Windows 8 media).  You can also optionally check the checkbox for "Never attempt to download payload from Windows Update"
  5. Click OK to close the Group Policy Editor
  6. Now open Control Panel-->Programs and Features
  7. Click on "Turn Windows Features on or off" in the left hand navigation
  8. Click on the checkbox for ".NET Framework 3.5 (includes .NET 2.0 and 3.0)
  9. Click the OK button to proceed with the installation


If all goes well, you should be able to successfully install .NET 3.5 on your Windows 8 RTM machine!


Friday, August 17, 2012

Changing the Product Key for Windows 8 Enterprise Edition

If you have recently installed Windows 8 Enterprise Edition, you may have noticed that there is no longer a User Interface for entering a product key during the Windows Activation process.  After seeing the lack of a UI, I suspected that I would have to resort to the command prompt and rely on "good old" slmgr.vbs.  As it turns out, I was correct.

You can review this article for more details on how to activate Windows 8 Enterprise Edition:

http://www.windows7hacker.com/index.php/2012/08/how-to-change-windows-8-product-key-to-complete-activation/

NOTE: This process can also be used for Windows Server 2012 Volume License Edition.

Visual Studio 2012 Must Have Features

If you have started using Visual Studio 2012, there are several new features that I consider "MUST HAVE" as part of every developer's toolbelt:

  1. Code Coverage
  2. Unit Test Mocking using Microsoft Fakes
  3. Code Metrics
  4. PowerPoint Storyboarding
  5. Code Clone
  6. UML Modeling using Activity, Sequence, Class, Component diagrams etc.
  7. Code Review
  8. Request Feedback from Customers
  9. UI Testing
  10. Web Performance Testing
  11. Load Testing
  12. Test Case Management

However, if you look at the comparison chart for Visual Studio 2012 editions here: http://www.microsoft.com/visualstudio/11/en-us/products/compare

You will discover that many of these features are reserved exclusively for Premium Edition users and in many cases Ultimate Edition users.

Fortunately, if you are a Microsoft partner, in all likelihood you already have access to the Premium Edition of Visual Studio 2012.  However, if you were hoping for the Ultimate Edition instead, those licenses are largely reserved for the Enteprise Microsoft Partners/Vendors or Partners that have achieved the Team Foundation Server competency.  If you do not fall into one of those categories, unfortunately, you may have to fork out the necessary cash to upgrade to the Ultimate Edition.

Ideally, Microsoft would offer all features/functionality in the Premium edition and reserve exclusive "Extension Packs" for the Ultimate Edition so that all Microsoft partners can reap the development benefits normally associated with Ultimate Edition.

If you work at a company that only has access to Visual Studio 2010/2012 Professional Edition, I feel your pain, I really do....

SQL Server 2012 Management Studio Performance Problems

I have been using SQL Server 2012 for quite a while now and therefore have been performing most of my administrative activities primarily in SQL Server 2012 Management Studio.  Generally, with every new release of SQL Server, I usually drop usage of the prior release of SQL Server Management Studio in favor of the latest release.

However, I recently discovered a major performance issue which affects SQL Server 2012 Management Studio.  

Like most developers, I own a hosting account which I use to perform my development activities.  In my particular case, I am using Arvixe hosting.  In the days before SQL Server 2012 Management Studio, I would frequently connect to my databases on Arvixe using SQL Server 2008 R2 Management Studio with no noticeable performance impact while viewing the various databases available on the Arvixe hosting server.

Arvixe, unlike some other hosting providers, allow developers to see ALL of the databases on the hosting SQL Server, but explicitly deny access to the various databases.  Of course, the consequence of this action is that there may be hundreds if not thousands of databases that need to be expanded in Object Explorer before you are able to select your own particular database.

Well, as I stated earlier, this did not seem to be a problem while using SQL Server 2008 R2 Management Studio.  However, as you can probably guess, this does not work so well with SQL Server 2012 Management Studio.  Instead, SQL Server 2012 Management Studio essentially ends up in what appears to be an infinite loop that is unable to ever successfully expand the databases in Object Explorer!

Below are screenshots of the resultant behavior in SQL Server 2012 Management Studio:


In contrast, this is the result from SQL Server 2008 R2 Management Studio Object Explorer:


So if you end up encountering the same problem with SQL Server 2012 Management Studio, don't abandon SQL Server 2008 R2 Management Studio just yet!! 

Thursday, August 16, 2012

Visual Studio 2012 and .Net 3.5 on Windows 8

If you currently develop applications which run on .Net Framework v. 3.5 and you install Visual Studio 2012 on Windows 8, you should know that BY DEFAULT, Windows 8 does not have an installed version of Microsoft.Net Framework v. 3.5.

Therefore, it will not appear in Visual Studio 2012 as depicted below:


Therefore, you will have to go into the Control Panel-->Programs and Features-->Turn Windows features on or off, and install .Net Framework v. 3.5 support.


Simultaneously, if you wish, you can also install Windows Identity Foundation 3.5 support:


If everything installs as expected, you should then be able to see all of the relevant .Net Development Frameworks as shown below:


Visual Studio 2012 RTM--No improvements in UI

Well, for those of you who were hoping for drastic and dramatic improvements in the Visual Studio 2012 User Interface for RTM vs. the Release Candidate, you will be sadly disappointed.

There appears to be little to no visible change in the appearance of the IDE between the Release Candidate and RTM version:


It seems that despite the many complaints about the lack of color in the Visual Studio 2012 UI, none of the requested changes seem to have been implemented for the RTM release.

We can only hope that Microsoft or some innovative 3rd party developers/vendors somehow determine how to bring colorful theming back to the Visual Studio 2012 IDE!!


Visual Studio 2012 RTM on Windows Server 2012 RC

If you are one of those folks that like to work with server OSes vs. desktop OSes like myself, you probably want to install Visual Studio 2012 RTM on Windows Server 2012.

Well, unfortunately, Windows Server 2012 RTM has not yet been released on MSDN, so the more adventurous of us are forced to install VS 2012 RTM on the RC release of Windows Server 2012.

As it turns out, however, Microsoft has completely blocked us from doing that.  Since .Net 4.5 ships out-of-the-box with Windows Server 2012, you are unable to install Visual Studio 2012 RTM on the RC release since the RTM release contains a later build of .Net Framework v. 4.5!!

Here is the screenshot from the blocked installation:


So until Microsoft allows us to download the full RTM release of Windows Server 2012, we are forced to rely on Visual Studio 2012 RTM installations either on Windows 8 or Windows 7...

Hopefully we will see the Windows Server 2012 RTM release coming to MSDN very soon!!


Wednesday, August 15, 2012

Windows 8 gets a facelift with RTM

If you have installed any prior release of Windows 8 in the past, you will be pleasantly surprised at the new look and feel of Windows 8 RTM!

The overall look and feel resembles a much more colorful interface similar to what we have been used to in the days of Windows 7 and Windows Vista:


Even the new Metro Start menu interface is far more colorful and pleasant than the earlier releases of the Metro interface that we have seen in the past:


Even the Task Manager is much more pleasing to look at now that it displays icons of the actual applications/programs that are running on your system:


Unfortunately, one of the hidden features I have discovered with Windows 8 is that the "minimize" button to minimize apps/windows on the desktop which is readily visible in Windows 7 (through its outdentation) is no longer visible in Windows 8!!  Oddly enough, however, if you click on the bottom right hand corner where the minimize button is "supposed to be" as it was in Windows 7, the minimize function works as expected!!  I am not quite sure why Microsoft decided to complete hide/mask the visibility of the minimize button, but it is there for those of us who like to use it.

Of course, you can continue to use the Windows shortcut keys to perform minimizations as well as described here (http://windows.microsoft.com/en-us/windows7/Minimize-all-open-windows-to-view-the-desktop).

If you are interested in reading further about some of the new enhancements in Windows 8, check out this article: http://www.winsupersite.com/article/windows8/windows-8-feature-focus-windows-desktop-142642


Windows 7 Start Menu on Windows 8 RTM!!

If like me, you are pining for the good "old" days of the Windows 7 Start menu while using Windows 8, never fear!!  The makers of ViStart have conveniently allowed us to use the Windows 7 Start menu that we have come to know and love back into Windows 8!!

You can download ViStart from here: http://lee-soft.com/vistart/

There were some earlier rumors that Microsoft was pulling out the functionality to use tools such as ViStart in Windows 8 RTM, but thankfully they have turned out to be false rumors after all....

Below is a screenshot of the Windows 7 Start Menu re-introduced through the installation of ViStart on Windows 8 Enterprise RTM:


One of the things that the ViStart menu DOES NOT bring back, however, are the typical conventions that we are used to with right clicking on Start menu items to perform various operations.  In fact, no right click menu support is available whatsoever.  Instead, we are still forced to perform right click menu operations through the new Windows 8 Start menu (or Windows Explorer) to perform the traditional operations we have come to know in Windows 7 such as Pin to Taskbar.

  1. Open the Windows 8 Start menu
  2. Find the Application Tile that you want to Pin to the Taskbar
  3. Right click on that Application Tile
  4. You will see a new pane with various button options
  5. Select the the Pin to Taskbar button
  6. Return to the Desktop and you should now see your newly pinned program


If you are looking for other Windows 8 Start Menu alternatives, you can check out this blog post: http://samirvaidya.blogspot.com/2013/02/list-of-windows-8-start-menu.html

If you are looking for a detailed comparison between Classic Shell and ViStart, you can check out this blog post:  http://samirvaidya.blogspot.com/2013/03/classic-shell-vs-vistart.html

Visual Studio 2012 RTM now available on MSDN!

Visual Studio 2012 RTM is now available for download from MSDN:

http://msdn.microsoft.com/subscriptions

In addition, Microsoft has released the other following products:

  1. Team Foundation Server 2012
  2. Windows 8
  3. Microsoft.Net Framework v. 4.5
  4. ASP.Net MVC 4 for Visual Studio 2010 SP1
Look forward to seeing the downloads for Windows Server 2012 on MSDN soon as well...

Monday, August 13, 2012

Applying a Watermark to all pages in an MS Word Document

I recently had to apply a "Draft" watermark to an MS Word document that had been handed to me from my co-workers.  However, the problem that I encountered was that each time I attempted to apply the "Draft" watermark to the document, it would only apply the watermark to a single page!!

If you are wondering how I attempted to apply a Draft Watermark to a page, this is how I did it (in Office 2010):


  1. Open up the MS Word document
  2. Click on the Page Layout tab in the Ribbon
  3. Click on the Watermark button
  4. Select the Draft watermark


Well, one of the problems that was introduced by the document is that all of the pages in the document did not use uniform standard headers/formatting.  Therefore, as soon as the Watermark was applied to one page, it would be wiped from the other pages.  I discovered this by attempting to apply the Watermark to various different pages with success in applying it to multiple pages while others only had it applied to a single page.

Fortunately, after some Google searching and investigation, I discovered the solution to be much more subtle.  As tedious as it was, I had to copy and paste the Watermark applied to each page in the header to all of the other pages that had varying headers.  Therefore, if I had 3 or more pages with varying headers (such as a Title page, Table of Contents and main content page), I had to copy and paste the header Watermark to each of these varying pages.


In this manner, I was able to get my "Draft" watermark to apply to all of the pages in the document!

The solution posted by Ross (in the comments below), looks like the following:

  1. From the Design tab in the Office Ribbon, select Watermark
  2. Select Custom Watermark...
  3. Choose Text watermark and from the Text dropdownlist, select "Draft"