Friday, May 30, 2014

Saving a SharePoint 2013 Publishing Site as a Template

If you come across this article from Microsoft: http://support.microsoft.com/kb/2492356 you will get the impression that you CANNOT save a Publishing site as a template.

In fact, several other workarounds such as browsing directly to the /_layouts/15/savetmpl.aspx Url or attempting to change the SaveSiteAsTemplateEnabled through SharePoint Designer will not work!

Fortunately, Microsoft has offered an alternative workaround through using PowerShell as described in this article: http://blogs.msdn.com/b/how24/archive/2013/06/13/save-publishing-site-as-a-template.aspx

After you run the PowerShell script, you will STILL not be able to save the site as a template from the Site Settings menu, but you can then successfully browse to the  /_layouts/15/savetmpl.aspx Url to save the Publishing Site as a template!


Thursday, May 29, 2014

Downloading older versions of TechSmith SnagIt

If you do frequent screen captures (like me), then most likely you are familiar with TechSmith SnagIt.

If your company purchases licenses for TechSmith SnagIt, it is unlikely that they pay to upgrade to every new release of the software that comes out. 

Therefore, at some time or other, you will probably need to download an older version of SnagIt to match your license key.

Fortunately, TechSmith allows you to download older versions of their screen capture software from here: http://www.techsmith.com/download/oldversions.asp

Incorrect User Agent String for Internet Explorer 11 using .NET v. 4.0

I frequently use Server-Side Browser Detection to enforce rules regarding browser compatibility to prevent people from using non-supported browsers with my application (especially older versions of Internet Explorer).

I was recently testing my Browser Detection library using Internet Explorer 11 and .NET v. 4.0.  Internet Explorer 11 is relatively new to the Windows 7/Windows Server 2008 R2 platform and ONLY ships with Windows 8.1 and Windows Server 2012 R2 so I really had not done much testing with it in the past.

Interestingly enough, I discovered that the browser information for Internet Explorer emulated Mozilla for the .NET v. 4.0 platform!!

Below is a screenshot of the results from running my test application in Internet Explorer 11:


Even more interesting is that this appears to be ONLY a problem with Internet Explorer 11 since Internet Explorer 10 is detected just fine.

As you can probably guess, this issue is already well known and even has a Connect feedback item here: http://connect.microsoft.com/VisualStudio/feedback/details/806542/fix-internet-explorer-11-not-detected-correctly-by-net-4-0-framework-when-custom-browser-files-are-used

This article describes a fix for this issue that does not require changing the version of the application, but rather simply installing .NET v. 4.5 on the target server: http://rikter.com/articles/2013/12/internet-explorer-11-and-asp-net/

After downloading and installing .NET Framework v. 4.5.1 from this link here: http://www.microsoft.com/en-us/download/details.aspx?id=40779, I was able to successfully detect Internet Explorer 11 correctly!


Windows Identity Foundation with .NET 4.5

If you have ever used Windows Identity Foundation in the past, you may already know that Microsoft decided to integrate Windows Identity Foundation directly into the .NET Framework v. 4.5.

In the past, you would have to install Windows Identity Foundation separately and then also install the Windows Identity Foundation SDK in order to use the available templates in Visual Studio.

However, with Windows Identity Foundation in .NET v. 4.5, you only need to install the Identity and Access Tool from the Visual Studio Gallery: http://visualstudiogallery.msdn.microsoft.com/e21bf653-dfe1-4d81-b3d3-795cb104066e

Unfortunately, this tool only supports Visual Studio 2012 :-(   If you think Microsoft should add support for the Visual Studio 2013 IDE, you can vote for this item here: http://visualstudio.uservoice.com/forums/121579-visual-studio/suggestions/5987303-provide-identity-and-access-tool-support-for-visua

You can learn more about how to work with Windows Identity Foundation in .NET 4.5 here: http://msdn.microsoft.com/en-us/library/hh377151.aspx


New Features in InstallShield 2014

InstallShield 2014 was just released a few weeks ago and includes a host of new features.

Some of the major improvements in this new release include the following:

  • Support for SQL Server 2014.
  • The ability to run the RemoveFiles action directly through the Files and Folders view.  Previously, this always had to be done through the MSI Direct Table Editor.
  • The ability to run Managed Actions in the Advanced Suite installations.
  • There is a new installation package type called a Multi-Tier installation.
  • The ability to launch a VM and directly copy the installation package into the targeted VM.  This is especially useful if you frequently use tools such as VMWare Workstation to test out your installations.
  • You can now deploy Web Deploy packages directly through InstallShield.

You can read the full Release Notes here: http://helpnet.installshield.com/installshield21helplib/ReleaseNotes.htm

Unfortunately, there are several features which have still not been improved in this latest release of InstallShield:

  • No improved support for PowerShell Custom Actions.  You still cannot pass parameters to a PowerShell Custom Action.
  • No additional Themes for User Interface design.
  • No additional capabilities for customizing the installation and deployment to IIS using the IIS deployment tooling within the IDE.  For example, there is still no built-in dialog to be able to select a website for targeting to deploy your installation.

If your company is already using InstallShield, this new version is definitely a welcome improvement over prior versions. 

However, if you are evaluating a new installation and packaging tool for your organization and considering InstallShield 2014, I would definitely consider Advanced Installer as a better and cheaper alternative.  Advanced Installer offers a much, much FASTER release cycle (think updates and new features nearly EVERY MONTH vs. EVERY YEAR http://www.advancedinstaller.com/version-history.html).  In addition, it offers many of the features currently missing in InstallShield and many, many more.  You can check out Advanced Installer here: http://www.advancedinstaller.com/download.html

Firefox 29 blacks out screen on scrolling

One of my favorite browsers is Firefox and when I read about the rave reviews about Firefox 29, of course, I went ahead and upgraded.

Of course, after putting Firefox 29 through its paces I discovered one seriously critical defect in the browser!

I am not exactly sure what triggers this behavior (probably a lot of open tabs), but upon scrolling down through a web page, the screen blacks out completely!!

Below is an example:


Notice that upon scrolling down through the screen, the screen completely blacks out!!

In addition, I have been experiencing far more frequent crashes (several times a day) vs. earlier versions of the Firefox browser.

Both of these defects makes Firefox v. 29 a much more unstable browser and I hope that the Mozilla team fixes these issues soon since this is definitely a showstopper!!  For now, I am sticking with Google Chrome!!

Update: Firefox v. 30.0 is not much better.  It still suffers from the blacking out of the screen and it still crashes frequently (see below):


Tuesday, May 27, 2014

Amazon Payment Method for nopCommerce

As many people know, nopCommerce by default does not ship with Amazon.com payment support.  Fortunately, an extension has been written which allows Amazon payments to be plugged into your nopCommerce E-Commerce engine (for a relatively low price):  http://www.nopcommerce.com/p/1327/amazon-simple-pay.aspx


Downloading Offline Product Documentation for SQL Server

If you want to download an offline copy of documentation for SQL Server, it is not that easy to find nowadays, however, it is DEFINITELY available.

For example, for SQL Server 2012, you can go here to find out about the Product Documentation: http://msdn.microsoft.com/en-us/library/ms166022.aspx

Then, under the link for Microsoft SQL Server 2012 Product Documentation for firewall and proxy restricted environments, you will be able to download an offline version of the Product Documentation for SQL Server.  http://www.microsoft.com/en-us/download/details.aspx?id=347

If you are looking for the SQL Server 2014 offline Product Documentation, you can find that here: http://www.microsoft.com/en-us/download/details.aspx?id=42557


Useful FREE .NET Development and Debugging Tools

If you are looking for some FREE .NET Development and Debugging tools, there are numerous ones out there, but they may not be so easy to find especially on sites such as Sourceforge.

Here are some of the tools that I have found useful:

Reflexil: http://sourceforge.net/projects/reflexil/?source=recommended
Dotnet IL Editor: http://sourceforge.net/projects/dile/?source=recommended
.deobfuscate: http://sourceforge.net/projects/dotdeobfuscate/?source=recommended
IMPROVE.NET Deobfuscator: http://sourceforge.net/projects/improvenetdeobf/?source=recommended
de4dot: http://sourceforge.net/projects/de4dot/?source=recommended

Collection of SharePoint Management PowerShell Scripts

If you are looking for a collection of ready-to-use SharePoint Management PowerShell scripts, look no further than this CodePlex project: http://sharepointpsscripts.codeplex.com/

This CodePlex project offers a wide variety of SharePoint Management PowerShell scripts that can be used for both the SharePoint 2010 and SharePoint 2013 platforms and covers many common tasks needed for daily management of a SharePoint Farm.


Monday, May 26, 2014

Providing feedback for Telerik Kendo UI

As many people know, Telerik Kendo UI is the compatible framework for ASP.NET MVC applications and is essentially considered the replacement for the Telerik RadControls for ASP.NET AJAX.

Unfortunately, though, if you have ever compared the 2 suites of controls, you can easily surmise that the Telerik Kendo UI suite of controls if far, far behind the Telerik RadControls for ASP.NET AJAX in both features and functionality.

Of course, Telerik Kendo UI is a relatively new framework comparatively, so the vast difference in features and functionality is certainly understandable.

However, you can finally do something about features that you miss from the Telerik RadControls for ASP.NET AJAX suite of controls.  You can provide your feedback and vote for features that you want included in the Telerik Kendo UI Framework.

Telerik Kendo UI now has their own UserVoice Feedback site where you can provide your feedback and vote on the issues that are most important to you!  http://kendoui-feedback.telerik.com/forums/127393-telerik-kendo-ui-feedback

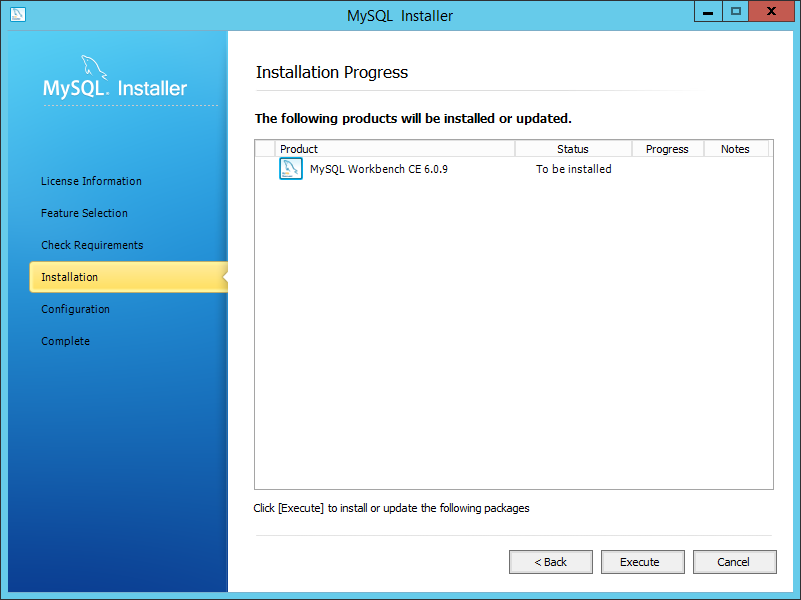
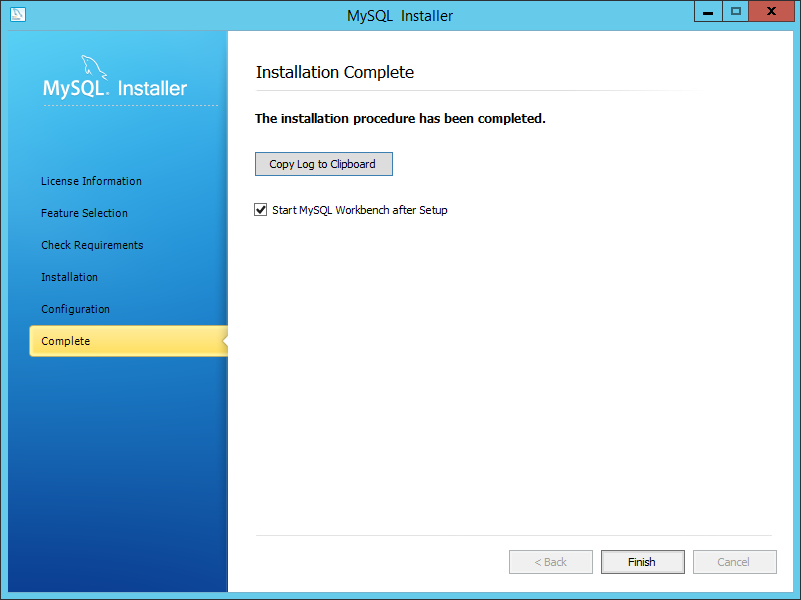
Installing MySQL Workbench

If you install MySQL using Microsoft Web Platform Installer, you will get an installation of MySQL installed with just the database platform and the appropriate MySQL Connectors similar to if you simply install SQL Server Express without any management tools.

However, chances are that you will want to manage the MySQL databases that are created for you to some degree.  Therefore, you will need MySQL Workbench.

You can download and install MySQL Workbench from here: http://dev.mysql.com/downloads/

Of course, you can install MySQL Workbench directly, but if you want to install more than 1 tool in the MySQL suite, then you can optionally use the MySQL Installer instead.

In this example, I have used the MySQL Installer to install MySQL Workbench:


Sunday, May 25, 2014

Installing WordPress using Microsoft Web Platform Installer

WordPress, much like Joomla!, only supports MySQL as the database backend.  Of course, if you are interested in installing a version of WordPress which supports SQL Server, you can take a look at Brandoo WordPress: http://wordpress.brandoo.pl/

In any case, if you want to install the main community version of WordPress, this is very easy to do so using Microsoft Web Platform Installer:


Installing Joomla! using Microsoft Web Platform Installer

There are many CMS systems out there, but among the free PHP-based CMS systems, Drupal and Joomla! are 2 of the most popular.

As with the installation of Drupal, you can also install Joomla! using the Microsoft Web Platform Installer.

However, unlike Drupal, Joomla! does not support installing on Microsoft SQL Server and instead requires MySQL.

Of course, if you want to install Joomla! manually, you can find rather detailed instructions here: http://www.iis.net/learn/application-frameworks/install-and-configure-php-applications-on-iis/install-joomla-on-iis

Fortunately, the Microsoft Web Platform Installer will also install MySQL for you so that the entire installation experience is seamless.


Installing Drupal using Microsoft Web Platform Installer

In recent years, Microsoft has made more of an effort to support non-Microsoft technologies on the Windows platform.

One of those technologies that has gained widespread support in the Microsoft community is PHP.

Before the release of the Microsoft Web Platform Installer, it was a rather tedious process to install and configure IIS to support PHP.

However, with the release of the Microsoft Web Platform Installer, Microsoft has made the process of not only configuring and supporting IIS for hosting PHP very easy but also even installing Content Management Systems such as Drupal!

You can download and install Microsoft Web Platform Installer from here: http://www.microsoft.com/web/downloads/platform.aspx

Drupal requires PHP (of course) as well as a database server such as MySQL or SQL Server 2008 R2 Express.

Even if you have a database server installed locally, if it is not a named instance of SQL Server 2008 R2 Express, the Web Platform Installer will FORCE you to install a new instance of SQL Server 2008 R2 Express.

Of course, after the initial prerequisites are installed on your system, the rest of the installation is basically following the steps in the wizard to install and setup your new Drupal Website.


Saturday, May 24, 2014

Detecting whether or not IIS is installed using InstallShield

I recently ran into an executable for a web application that threw an error message/exception in a Custom Action.

As it turns out, the error message was thrown because the Custom Action was dependent on an installation of IIS being present.

Fortunately, detecting IIS is rather simple using a Windows Installer package such as InstallShield.

If you use the Internet Information Services deployment capabilities under the Server Configuration section of InstallShield, IIS detection will automatically occur for you.

However, one downside of using the InstallShield IIS capabilities is that it severely restricts you to the supported versions of IIS that ship with the version of InstallShield that you are using.  In addition, the ability to select available Web Sites and other configuration in IIS are also restricted.

Therefore, if you want this additional flexibility, it is better to perform your own IIS detection.  This can be done through using System Search.

You will want to create a System Search for a Registry Entry with the following path: HKEY_LOCAL_MACHINE\SOFTWARE\Microsoft\InetStp\InstallPath


Once you have created the System Search, you will want to store the value in a Property and use it as an Install Condition.


Then, when you run the installation, if IIS is not installed, then you will receive an error message indicating that you need to install IIS before proceeding with the installation.

This technique should work for most versions of Windows Server.  I have tested this with versions of Windows Server from Windows Server 2003 all the way through Windows Server 2012 R2 and it has worked in all of these instances!


How to add the ServerManager Module to PowerGUI

If you are performing any type of administrative tasks on Windows Server 2012 or Windows Server 2012 R2, you will probably want to import the ServerManager module.

You can normally do this at the top of any PowerShell script, by simply typing:

Import-Module ServerManager

However, if you are working with PowerGUI, you can easily add ServerManager so that it is available for ALL of your PowerShell scripts!


  1. Start by selecting File-->PowerShell Libraries
  2. If you search for the ServerManager module, you will notice that it is not there already.
  3. You will have to click on Add Module...
  4. Type in ServerManager and click OK.
  5. You will then see that the ServerManager module will load into PowerGUI.
  6. You will now have Intellisense available for all ServerManager PowerShell tasks!


SQL Server 2014 Installation Requirements

I was recently attempting to install SQL Server 2014 on a brand new installation of Windows Server 2012 R2 and I encountered the following error message:


Interestingly enough, Microsoft has STILL not completely removed dependencies on .NET Framework 3.5 SP1, therefore, I still needed to go into Windows Server Manager and add these features back into the system.

Since I LOVE PowerShell, I followed this article to install .NET Framework v. 3.5 SP1 on my system: http://technet.microsoft.com/en-us/library/dn482068.aspx


Restoring a database from a backup using T-SQL (Transact SQL)

If you refer to MSDN for guidance on how to accomplish this, you will probably encounter these 2 articles:


RESTORE (Transact-SQL)
http://msdn.microsoft.com/en-us/library/ms186858.aspx


How to: Restore a Database to a New Location and Name (Transact-SQL)
http://technet.microsoft.com/en-us/library/ms190447%28v=sql.105%29.aspx

Unfortunately, the provided examples are dependent on the usage of a backup device.  If you do not want to bother with creating a backup device, then you are better off following this article: http://blog.sqlauthority.com/2007/02/25/sql-server-restore-database-backup-using-sql-script-t-sql/

Of course, if you have an older database backup and want to update the compatibility level to the latest version of SQL Server, then you will also have to run this command:


ALTER DATABASE Compatibility Level (Transact-SQL)
http://msdn.microsoft.com/en-us/library/bb510680%28v=sql.120%29.aspx

Wednesday, May 21, 2014

Connection Timeout Expired. The timeout period elapsed during the post-login phase.

I recently installed SharePoint 2013 on a server, and I started receiving these error messages in the Windows Event Log:

Cannot connect to SQL Server.  <database server> not found.  Additional error information from SQL Server is included below.

Connectino Timeout Expired.  The timeout period elapsed during the post-login phase. The connection could have timed out while waiting for server to complete the login process and respond; Or it could have timed out while attempting to create multiple active connections.  The duration spent while attempting to connect to this server was - [Pre-Login] initialization=3; handshake=12; [Login] initialization=0; authentication=0; [Post-Login] complete=14006;

After searching for some additional information on the Internet, it was recommended that I change the database connection timeout using the stsadm tool:  http://technet.microsoft.com/en-us/library/cc263314.aspx

Unfortunately, when I ran the command initially (without the Url), I got the following error message:

stsadm -o setproperty -pn database-connection-timeout -pv 45

Object reference not set to an instance of an object.

When I subsequently ran the command with the Url switch, I now got the following error message:
  
stsadm -o setproperty -pn database-connection-timeout -pv 45 -url http://sharepoint.contoso.com

This operation can be performed only on a computer that is joined to a server farm by users who have permissions in SQL Server to read from the configuration database.  To connect this server to the server farm, use the SharePoint Products Configuration Wizard, located on the Start menu in Microsoft SharePoint 2010 Products.

Well, I knew that the server was part of the server farm already, so I did a bit more digging on the Internet and found this article: http://mysharepointwork.blogspot.com/2010/02/cannot-connect-to-sql-server-sqlserver.html

Well, I did not think of looking at the IIS Application Pools earlier, so I decided to take a look.

Everything looked to be in order, EXCEPT that the SharePoint Web Services Root Application Pool was STOPPED!

So, out of curiosity, I decided to Start the SharePoint Web Services Root Application Pool.

I then re-ran the stsadm command and believe it or not, I got this response:
Operation completed successfully.

Yay! 

So, in order to make sure that stsadm commands run correctly, ALWAYS make sure that the SharePoint Web Services Root Application Pool is started.

Tuesday, May 20, 2014

Considerations for the Default Web Site in SharePoint Installations

When installing SharePoint, by default the installation will create a brand new website in IIS to host the SharePoint web site.  The new website will generally be created and hosted on port 80.

Unfortunately, the Default Web Site also is hosted on port 80!  Of course, this will cause a port conflict error.

Therefore, several things can happen on your server when you initially install SharePoint:

  • The Default Web Site will stop working
  • The SharePoint Web Site will stop working
  • The next time you reboot the server, the SharePoint Web Site will stop working.

So what should you do?  Well, if you are not currently using the Default Web Site for anything else, then it is recommended that you either delete the Default Web Site or change the port number for the Default Web Site to something other than port 80.

If you are using the Default Web Site to host some existing content and you need the Default Web Site to remain on port 80, then you should instead configure Host Headers on your Web Sites to prevent port conflict errors.

Performing Granular Backups using Windows Powershell in SharePoint 2013

I was recently trying to perform a Granular Backup in Windows PowerShell by following this article: http://blogs.msdn.com/b/russmax/archive/2009/10/21/sharepoint-2010-granular-backup-restore-part-1.aspx

Unfortunately, when I ran the command provided in the article, I received the following error message:

Export-SPWeb : The URL provided is invalid. Only valid URLs that are site collections or sites are allowed to be exported using stsadm.exe.

This was unusual because I followed the article exactly and used the exact same syntax for the command.
 
$siteUrl = "http://sp2013alone/sites/teamsite"
$itemUrl = "/My Docs"
$backupFilePath = "C:\Temp\doclib.cmp"
 
Clear-Host
Export-SPWeb -Identity $siteUrl -ItemUrl $itemUrl -Path $backupFilePath -IncludeVersions All -Force


However, I decided to play around with some of the values to see if I could get the command to execute and as it turns out, this was the final command I was able to execute successfully:


$siteUrl = "http://sp2013alone/sites/teamsite"
$itemUrl = "My Docs"
$backupFilePath = "C:\Temp\doclib.cmp"
 
Clear-Host
Export-SPWeb -Identity $siteUrl -ItemUrl $itemUrl -Path $backupFilePath -IncludeVersions All -Force


Notice that I had to remove the beginning “/” from the beginning of the ItemUrl.  Once I removed this character from the beginning of the ItemUrl path, I was able to successfully export the granular backup of my Document Library!

Sunday, May 18, 2014

Result of assigning "Deny All" to Domain Users Group in Web Application User Policy

I recently encountered a very unusual question which I had never really thought about before.

The crux of the question revolved around setting the "Deny All" permission in User Policy for the Web Application to the Domain Users group.  All users belong to the Domain Users group, so are there any overriding permissions for Farm Administrators, Site Collection Administrators or Site Owners?

Well, since I was not sure of this question myself, I decided to try it out and see what happened.

So, of course, I had to go into Central Administration and set this up:


  1. Click on Manage Web Applications from Central Administration
  2. Highlight the specific Web Application that I needed to change User Policy
  3. Click on the User Policy button
  4. Click on Add Users
  5. Click Next
  6. Type in <domain name>\domain users and check the check box for "Deny All"
  7. Click the Finish button


Well, as you can probably guess from the description of "Deny All", you can see that none of the users in the Domain Users group should have access (hence, no access).  Therefore, according to this, even the Farm Administrator will be denied access to any of the Site Collections.

Therefore, if the Farm Administrator is denied access, all other users should be denied access as well!!

So, to test this out, I tried logging in with the Farm Administrator account and this was the error message I received:


As you can guess, I tried out the other accounts in the Site Collection Administrator and Site Owner groups, but they all failed.

Therefore, if you set up an explicit "Deny" permission for a domain group such as Domain Users, ALL accounts will be denied permission EVEN the Farm Administrator account!!

Friday, May 16, 2014

Comcast spells bad news for MSDN Subscribers

If you are currently a Comcast subscriber, you may want to check out this article: http://www.pcworld.com/article/2155286/comcast-exec-says-bandwidth-caps-for-all-to-return-within-five-years.html#tk.nl_today

If this bandwidth cap does indeed end up taking place for all Comcast subscribers, this will definitely spell bad news for MSDN Subscribers.

As most developers (and MSDN Subscribers in particular) well know, downloading software such as ISO images from MSDN can easily consume lots of bandwidth.  If you download multiple ISO images, service pack downloads, Visual Studio tools, and work with web sites or Virtual Machines in the cloud, you can easily guess that you will probably eat through a standard allotment of bandwidth pretty quickly.

Fortunately, for me, I am a WOW! Customer so this will not affect me (at least in the near term).  However, if Comcast sets a precedent for all other ISPs, this spells bad news for everyone....

SharePoint 2013 SP1 explained

As was the case with SharePoint 2010 SP1, SharePoint 2013 SP1 faced a similar fiasco upon its release.

In the case of SharePoint 2010 SP1, the June Cumulative Update was REQUIRED to be applied in order to resolve issues with the release of SP1.

However, with the release of SharePoint 2013 SP1, Microsoft took a different approach.  Instead of leaving the SP1 release as is, Microsoft recalled the original release and re-released SP1 here: http://www.microsoft.com/en-us/download/details.aspx?id=42544

Of course, if you downloaded SharePoint 2013 with SP1, then Microsoft has not yet released an updated version of this download. 

If you read up on some articles on SharePoint 2013 SP1, you will probably figure out that the original release of SP1 does not contain the fixes available with the re-release of SP1 including support for SQL Server 2014!

So how do you resolve this issue?

Well, the simple solution simply involves downloading the re-released SP1 release and integrating it into the Updates folder of either the RTM or the slipstreamed SP1 media.  Both of these methods allow integrating the latest updates into the initial installation.  You simply download the SP1 executable and use the /extract:<file path> switch to extract the content.  You then copy the extracted content into the Updates folder of the SharePoint media and install!


Breadcrumbs missing from SharePoint 2013

If you have recently compared SharePoint 2010 with SharePoint 2013, you may have noticed that one of the major navigational features missing in SharePoint 2013 is breadcrumbs!

It is unclear as to why Microsoft removed this very useful feature, but fortunately, you can alter the Master Page in SharePoint Designer to bring back this feature in SharePoint 2013.

This article describes how to do just that: http://academy.bindtuning.com/lets-bring-the-breadcrumb-back-to-sharepoint-2013/

Unfortunately, the directions do not tell you that you need to enable the SharePoint Publishing Feature to support this change!!

You can do that by the following:

  1. In Site Collection Features, activate the SharePoint Server Publishing Infrastrucutre
  2. In Manage Site Features, activate the SharePoint Server Publishing feature
  3. You should now see the Master Page link under Look and Feel