Monday, March 30, 2015

Testing Authorization Header Bearer Tokens with OAuth2 and ASP.NET Web API

If you are testing your OAuth2 ASP.NET Web API Host, you are probably going to use a tool that allows you to test your ASP.NET Web API endpoints such as Telerik Fiddler.

Unfortunately, if you are not using a tool that automatically provides the correct header information values for you, you are left to look up those appropriate values yourself since Fiddler does not provide any default header information.

If you want to generate your Bearer Token, you can set up Fiddler to pass the following parameters in the Request Body like so:


Once you have obtained the Bearer Token, in the Composer Headers section, you type in the following:


Authorization: Bearer <bearer token>

Therefore, your Fiddler Composer screen will look something like this:


That is all there is to it!!

Sunday, March 29, 2015

VMWare Workstation automatically suspends/pauses Windows 10 VMs

I had recently built a Windows 10 virtual machine in VMWare Workstation when I noticed that the VM was automatically suspending/pausing without any user interaction from me!

Well, this was very curious because this never occurred when I was using my Windows Server 2012 R2 VMs (or any Server VM for that matter).

Therefore, I figured there was something specific to my Windows 10 configuration that was triggering this behavior which would not be triggered in my Windows Server virtual machines.

Well, I decided to check out the Power Options in the Control Panel to see if the underlying Guest OS was going to sleep or hibernating:


As you can tell from the screenshot above, the display was being turned off and the computer was being put to sleep after 30 minutes!

Well, I decided to change the Power Plan settings to the following:


As you can probably guess, changing this setting resolved my issue of VMWare automatically suspending my Windows 10 virtual machine!!


Secure ASP.NET Web API with Windows Active Directory and Microsoft OWIN Components

If you are looking to secure your ASP.NET Web API using OWIN/Katana with just "plain old" Windows Active Directory, unfortunately, you will only find articles like the following on securing your application:

http://www.cloudidentity.com/blog/2013/12/10/protecting-a-self-hosted-api-with-microsoft-owin-security-activedirectory/

https://msdn.microsoft.com/en-us/magazine/dn463788.aspx

As you can tell from the above articles, these articles specifically address "Azure Active Directory"!

But if you want to secure your application with just standard Windows Active Directory, you won't find much guidance in that arena.

Fortunately, plugging in Windows Active Directory support into your OWIN/OAuth Pipeline is not that much more difficult than using standard Forms Authentication with Active Directory as I have outlined in my previous article: http://samirvaidya.blogspot.com/2015/03/aspnet-mvc-forms-authentication-with.html

The main element to take away from standard Forms Authentication is the use of the Membership API to validate your Active Directory User Credentials and plug it into the OWIN/OAuth Pipeline. 

Therefore, if you use a code sample from my earlier OAuth article references (http://samirvaidya.blogspot.com/2015/03/aspnet-web-api-owinkatana-and-jwt.html), you can simply modify the ValidateClientAuthentication method to include code such as the following:

public override Task ValidateClientAuthentication(OAuthValidateClientAuthenticationContext context)

{

    try

    {

        var username = context.Parameters["username"];

        var password = context.Parameters["password"];


        //Use the Active Directory Membership Provider to authenticate the user credentials

        if (Membership.ValidateUser(username, password))

        {

            context.OwinContext.Set("otc:username", username);

            context.Validated();

        }

        else

        {

            context.SetError("Invalid credentials");

            context.Rejected();

        }

    }

    catch

    {

        context.SetError("Server error");

        context.Rejected();

    }

    return Task.FromResult(0);

}

That is all there is to it!!


Unable to establish secure connection with the server

I was recently working on using Forms Authentication with Active Directory when I suddenly received the following error message:


Unable to establish secure connection with the server

I double checked my connectivity to the server and everything looked OK to me.  However, the computer that I was testing with was not connected to the target Domain.

Was there any workaround other than joining my workstation to the same Domain as the Active Directory server?

Well, as it turns out there is!

You can simply add the following setting to the Active Directory membership provider configuration in the Web.config file:

<membership defaultProvider="ADMembershipProvider">
  <providers>
    <clear />
    <add name="ADMembershipProvider" type="System.Web.Security.ActiveDirectoryMembershipProvider" connectionStringName="ADConnectionString" attributeMapUsername="sAMAccountName" connectionUsername="mydomain\domainuser" connectionPassword="domainPassword!"  />
  </providers>
</membership>

Then, you may have to switch the LDAP/Active Directory connection string to the following:


<connectionStrings>
<add name="ADConnectionString" connectionString="LDAP://10.10.10.1:389/DC=mydomain,DC=com"  />
</connectionStrings>


After doing this, I was able to connect successfully to the Domain even when my computer/workstation was not joined to the Domain!


Understanding the HandleError attribute in ASP.NET MVC

If you are new to ASP.NET MVC, you may not be aware of the HandleError attribute available for handling errors within an ASP.NET MVC Web Application.

Basically, you can add the following line of code in the FilterConfig.cs file and ASP.NET MVC will supposedly handle all errors that occurs within the MVC Web Application:

filters.Add(new HandleErrorAttribute());


However, one caveat to being able to use the HandleError attribute is that it will ONLY handle errors or exceptions that occur within the ASP.NET MVC Web Application such as 500 (Internal Server) errors.  Any other exceptions that occur before the ASP.NET MVC Execution Pipeline will not be handled (such as as loading exceptions or 404-Page Not Found Error messages etc.)

In addition, if you do not set the customErrors element to "On" in Web.config, it will also not trigger the handling of those errors:


<customErrors mode="On" defaultRedirect="~/Views/Shared/Error" />

If you simply want to redirect to the Error View without any additional processing in a specific Controller, you can use the element as outlined above.


Then, you can define a basic Razor Error View such as the following:


@model System.Web.Mvc.HandleErrorInfo


<!DOCTYPE html>

<html>

<head>

    <meta name="viewport" content="width=device-width" />

    <title>Error</title>

</head>

<body>

    <hgroup>

        <h1>Error.</h1>

        <h2>

            An error occurred while processing your request.

            <br />

            Error Message: @Model.Exception

            <br />

            Action Method: @Model.ActionName

            <br />

            Controller Name: @Model.ControllerName

        </h2>

    </hgroup>

</body>

</html>


However, what if you want to handle other exceptions or errors that occur in your ASP.NET MVC Web Application?


Well, you still have to resort to handling those errors in your Global.asax events—namely the Application_Error event handler.


This article does a very good job of covering the scenarios to handle other errors outside of the ASP.NET MVC Execution pipeline: http://www.codeproject.com/Articles/422572/Exception-Handling-in-ASP-NET-MVC

These articles also do a good job of discussing the same approach to MVC Error Handling: http://michael-mckenna.com/blog/error-handling-in-asp-dot-net-mvc-part-1-our-options
http://michael-mckenna.com/blog/error-handling-in-asp-dot-net-mvc-part-2-our-implementation

When it comes to the Global.asax, it provides the following code:


protected void Application_Error(object sender, EventArgs e)

{

   var httpContext = ((MvcApplication)sender).Context;

   var currentController = " ";

   var currentAction = " ";

   var currentRouteData = RouteTable.Routes.GetRouteData(new HttpContextWrapper(httpContext));


   if (currentRouteData != null)

   {

       if (currentRouteData.Values["controller"] != null && !String.IsNullOrEmpty(currentRouteData.Values["controller"].ToString()))

       {

           currentController = currentRouteData.Values["controller"].ToString();

       }


       if (currentRouteData.Values["action"] != null && !String.IsNullOrEmpty(currentRouteData.Values["action"].ToString()))

       {

           currentAction = currentRouteData.Values["action"].ToString();

       }

   }


   var ex = Server.GetLastError();

   var controller = new ErrorController();

   var routeData = new RouteData();

   var action = "ErrorHandler";


   if (ex is HttpException)

   {

       var httpEx = ex as HttpException;


       switch (httpEx.GetHttpCode())

       {

           case 404:

               action = "NotFound";

               break;


           // others if any

       }

   }


   httpContext.ClearError();

   httpContext.Response.Clear();

   httpContext.Response.StatusCode = ex is HttpException ? ((HttpException)ex).GetHttpCode() : 500;

   httpContext.Response.TrySkipIisCustomErrors = true;


   routeData.Values["controller"] = "Error";

   routeData.Values["action"] = action;


   controller.ViewData.Model = new HandleErrorInfo(ex, currentController, currentAction);

   ((IController)controller).Execute(new RequestContext(new HttpContextWrapper(httpContext), routeData));

}


ASP.NET MVC Forms Authentication with Active Directory

If you want to implement Forms Authentication with Active Directory using ASP.NET MVC, this is an excellent article on how to accomplish this: http://www.schiffhauer.com/mvc-5-and-active-directory-authentication/

Unfortunately, it is missing a key point that is addressed by this MSDN article: https://msdn.microsoft.com/en-us/library/ff650308.aspx

In order to be forced to the User Login View, you have to also include the following section in the Web.config file:

<authorization> 
    <deny users="?" />
    <allow users="*" />
</authorization>

If you forget to include this section in your Web.config, you will not be automatically redirected to your Login screen. 


Even if you include this code in your FilterConfig.cs file, the Login redirection will still not occur:


public static void RegisterGlobalFilters(GlobalFilterCollection filters)
{
    filters.Add(new HandleErrorAttribute());
    filters.Add(new AuthorizeAttribute());
}

Therefore, make sure you do not forget the authorization section in your Web.config file!!


Saturday, March 28, 2015

Implementing Refresh Tokens using OAuth2, OWIN and ASP.NET Web API

If you want to implement Refresh Tokens in your OWIN application with OAuth2, searching for how to accomplish this is not the easiest thing to find on the web.

Fortunately, Dominick Baier comes to the rescue regarding this topic: http://leastprivilege.com/2013/11/15/adding-refresh-tokens-to-a-web-api-v2-authorization-server/

This thread provides a much simpler solution to Dominick Baier's implementation of Refresh Tokens, but may not meet all of your needs and does not address overriding the GrantRefreshToken method in the
OAuthAuthorizationServerProvider class:  http://stackoverflow.com/questions/20637674/owin-security-how-to-implement-oauth2-refresh-tokens

However, when I implemented the 2 solutions in conjunction with the solution provided by Scott Allen: http://odetocode.com/blogs/scott/archive/2015/01/15/using-json-web-tokens-with-katana-and-webapi.aspx

I ended up with the following results when using the Stack Overflow solution:


As you can from the screenshot above in Fiddler, I am getting a Refresh Token back as expected.

However, when implementing Dominick Baier's solution, I got the following result:


Instead of getting the Refresh Token back as expected, I obtained an as:client_id value back.  Therefore, the code sample as posted in the article does not present a complete solution and is probably dependent on many other aspects in the solution to get everything working as expected.  You can get the full source code for Dominick Baier's solution here: https://github.com/IdentityModel/Thinktecture.IdentityModel/tree/master/samples/OAuth2/EmbeddedResourceOwnerFlowWithRefreshTokens

For your convenience, I have provided the a variation of the code from the Stack Overflow article as well as Scott Allen’s code here:
public class ApplicationRefreshTokenProvider : AuthenticationTokenProvider

{


    private int _tokenExpiration;


    public ApplicationRefreshTokenProvider()

    {

        _tokenExpiration = Convert.ToInt32(ConfigurationManager.AppSettings["TokenExpiration"]);

    }

    public override void Create(AuthenticationTokenCreateContext context)

    {

        // Expiration time in seconds

        int expire = _tokenExpiration;

        context.Ticket.Properties.ExpiresUtc = new DateTimeOffset(DateTime.Now.AddMinutes(expire));

        context.SetToken(context.SerializeTicket());

    }


    public override void Receive(AuthenticationTokenReceiveContext context)

    {

        context.DeserializeTicket(context.Token);

    }


}


OAuthOptions = new OAuthAuthorizationServerOptions

{

    TokenEndpointPath = new PathString("/Token"),

    Provider = new ApplicationOAuthProvider(),

    AccessTokenFormat = new MyJwtFormat(),

    RefreshTokenProvider = new ApplicationRefreshTokenProvider(),

    AccessTokenExpireTimeSpan = TimeSpan.FromMinutes(tokenExpiration),

    AllowInsecureHttp = true

};

Thursday, March 26, 2015

Changing a SQL Server database from Single User Mode to Multi User mode

I was recently attempting to detach/drop a database from SQL Server Management Studio when the detach suddenly failed.

Of course, this suddenly placed the database in Single User Mode.  When I subsequently tried to connect to the database again, I could not access it!

If I tried to open a query and run the following command:

USE master
ALTER DATABASE MyDatabase Set MULTI_USER

The query inevitably failed because the database was already locked and in use by an existing process.

Therefore, in order to figure out who was holding the locks on the database, I had to run the following command:

sp_who2

Once I got a list of all the sessions and their associated databases, I had to run the following command:

KILL <session id>

Now, once I had killed all of the sessions that were attached to the database, I could once again run the following command:

USE master
ALTER DATABASE MyDatabase Set MULTI_USER

Now, the database was back in Multi User mode again and I could proceed with detaching/dropping the database directly from SQL Server Management Studio!

Setting up Beyond Compare for comparison of files in Team Foundation Server/Visual Studio

If you need to frequently compare the Version History of files in Team Foundation Server or you frequently merge files from your branches back to your trunk, the built-in File Comparison Tool in Visual Studio 2013 is an acceptable method of accomplishing this, but most developers will agree, that a tool such as Beyond Compare provides much better comparison and merging functionality than the built in File Comparison Tool provided by Visual Studio:  http://scootersoftware.com/

If you want to avoid manually copying and pasting the key into the "Enter Key" dialog after installation of Beyond Compare, you can simply rename the text file containing the license key into a file called "BC4Key.txt".  You then run the installation file from the same directory containing the BC4Key.txt file and the key will automatically be registered for you!!

Finally, in order to change Visual Studio to use Beyond Compare for comparison and merging, you can follow the instructions provided in this Support article: http://www.scootersoftware.com/support.php?zz=kb_vcs#tfs


Where are the SharePoint ULS Logs?

If you are looking for the SharePoint ULS Logs,  the default path log locations are below:

For SharePoint 2010:
C:\Program Files\Common Files\Microsoft Shared\Web Server Extensions\14\Logs

For SharePoint 2013:
C:\Program Files\Common Files\Microsoft Shared\Web Server Extensions\15\Logs

Optionally, if you wish to change the location of the ULS logs, you can do so in Central Administration:


  1. In Central Administration, click on Monitoring
  2. You can then click on "Configure diagnostic logging" to alter the path to the diagnostic Trace Logs
  3. To alter the usage logs, you can click on "Configure usage and health data collection" and alter the path for the logs under Usage Data collection Settings.


Now, if you wish to view and actually MAKE SENSE of the ULS Logs, then you will want to use one of the various ULS Log Viewers that are available for download:

http://ulsviewer.codeplex.com/

http://sharepointlogviewer.codeplex.com/

http://archive.msdn.microsoft.com/ULSViewer/


The ULS Log Viewer that you choose is largely a matter of personal preference, but it seems that the CodePlex projects seem to provide more functionality than the ULS Log Viewer provided on the MSDN Code site.

If you need to view ULS Logs from a SharePoint 2013 installation, ONLY the http://sharepointlogviewer.codeplex.com/ project provides SharePoint 2013 support.

UPDATE: Microsoft is now providing an updated version of the ULS Log Viewer for SharePoint 2013!!  http://www.microsoft.com/en-us/download/details.aspx?id=44020


Installing SharePoint 2013 Prerequisites Offline

I recently had to install SharePoint 2013 on a server that could not download the source files for Windows Server 2012 R2 or any files from the Internet, so I was forced to download them individually.

This is the article that I followed for downloading the SharePoint 2013 Prerequisites: http://social.technet.microsoft.com/wiki/contents/articles/14582.sharepoint-2013-install-prerequisites-offline-or-manually-on-windows-server-2012-a-comprehensive-guide.aspx#Installing_the_Roles_and_Features_for_SharePoint_2013_on_Windows_Server_2012_Offline_with_PowerShell

Of course, you can run the PowerShell command they provide or you can follow this article: https://technet.microsoft.com/en-us/library/ff686793.aspx

The problem with the PowerShell command is that it has to be formatted correctly or else it will not execute correctly.  The approach using the PrerequisiteInstaller.Arguments.txt file is also a bit of a lengthy process as well. 

Therefore, I found a pretty reliable workaround solution that lets you get through installing the prerequisites with very little additional effort:

  1. Store all of your download Prerequisites in a folder called PrerequisiteInstallerFiles
  2. Copy the PrerequisiteInstaller.exe and msvcr100.dll in a directory above the PrerequisiteInstallerFiles directory
  3. Run the PrerequisiteInstaller executable
  4. The PrerequisiteInstaller will automatically find the downloaded Prerequisites for you and begin installing them.
  5. This process will ensure that all of your Prerequisites install successfully with a UI confirmation.
  6. You can then proceed with the remainder of your SharePoint installation!

Migrating TeamCity to a new server environment

I recently had to migrate a Jetbrains TeamCity installation to a brand new server environment including a brand new instance of SQL Server.

If you have already read my earlier post: http://samirvaidya.blogspot.com/2015/02/migrating-teamcity-to-new-server-when.html, the process is pretty much the same as earlier.

  1. Install a fresh copy of Jetbrains TeamCity
  2. Stop the TeamCity Server and Build Agent services
  3. Copy over the TeamCityData directory to the new server (in some cases only the config and lib directories are needed)
  4. Restore the existing TeamCity database to the new SQL Server
  5. Update the database.properties file to point to the new SQL Server
  6. Restart the TeamCity Server and Build Agent services
  7. Verify that you can log into the new system

One of the things that I noticed, however, after the migration was that my NuGet settings were not retained.  Therefore, I had to update the version of my NuGet executable in the Administration section to point to the desired version.

That was all there was to it!!

A better Popup blocker for Mozilla Firefox and Google Chrome

Have you ever noticed that even when you have the Popup Blocker settings turned on in Mozilla Firefox and Google Chrome, some ads still manage to sneak their way in?

Well, fortunately the makers of Adblock Plus have figured out how to close those loopholes. 

In my tests on some very ad-heavy sites, Adblock Plus was able to successfully block ALL of the Popup windows on the site, thus allowing me to view the page content without any interference from any annoying Popup Ads.

You can get the Popup Blocker addon for Mozilla Firefox from here: https://addons.mozilla.org/en-us/firefox/addon/adblock-plus-pop-up-addon/?src=hp-dl-mostpopular

NOTE: You will still need the original Adblock Plus addon from herehttps://addons.mozilla.org/en-us/firefox/addon/adblock-plus/?src=search

As for Google Chrome, it seems Adblock Plus bakes the Popup Blocker functionality right into the original software: https://chrome.google.com/webstore/detail/adblock-plus/cfhdojbkjhnklbpkdaibdccddilifddb?hl=en-US

Wednesday, March 25, 2015

Sending and receiving Custom Request Headers in ASP.NET Web API

If you ever have to send any custom header information to an ASP.Net Web API Service, it is not exactly easy to figure out how to accomplish this.

This MSDN Article does a pretty good job but does not clarify several important elements: http://www.asp.net/web-api/overview/advanced/http-message-handlers

So, if you simply want to send a custom Request Header using the HttpClient class, you can use code similar to the following:

IEnumerable<string> headerValues = new List<string>() {"customValue1", "customValue2"};
httpClient.DefaultRequestHeaders.Add("CustomHeader", headerValues);


Then in ASP.NET Web API, you can consume the Request Header like so:


public IEnumerable<string> Get()
{
    const string _header = "CustomHeader";
 
    IEnumerable<string> headerValues = new List<string>();
 
    if (Request.Headers.Contains(_header))
    {
        // Check if the header value is in our methods list.
        headerValues = Request.Headers.GetValues(_header);
    }
 
    return headerValues;
}


If these Custom Request Headers need to be consumed throughout the application, then you can take a look at consuming them in the ApiController’s constructor instead:


public class ValuesController : ApiController
{
    
    IEnumerable<string> _headerValues = new List<string>();
 
    public ValuesController()
    {
        const string _header = "CustomHeader";
        
    
        if (Request.Headers.Contains(_header))
        {
            // Check if the header value is in our methods list.
            _headerValues = Request.Headers.GetValues(_header);
        }
 
        public IEnumerable<string> Get()
        {
            return _headerValues;
        }    
    }
}


Tuesday, March 24, 2015

Moving Team Foundation Server to a new server

If you have to move your Team Foundation Server to a new server, then you will definitely want to read this article: https://msdn.microsoft.com/en-us/library/ms404869.aspx

Unfortunately, the article leaves out some crucial information and screenshots.

There is the following line in the article:

"To configure a new server or servers for TFS, you must first install and configure the software that is required to support it."

What does that mean exactly?  Does that mean that only the installation binaries are required to be setup on the server, or does this require some additional setup on the server which is not mentioned in the article?

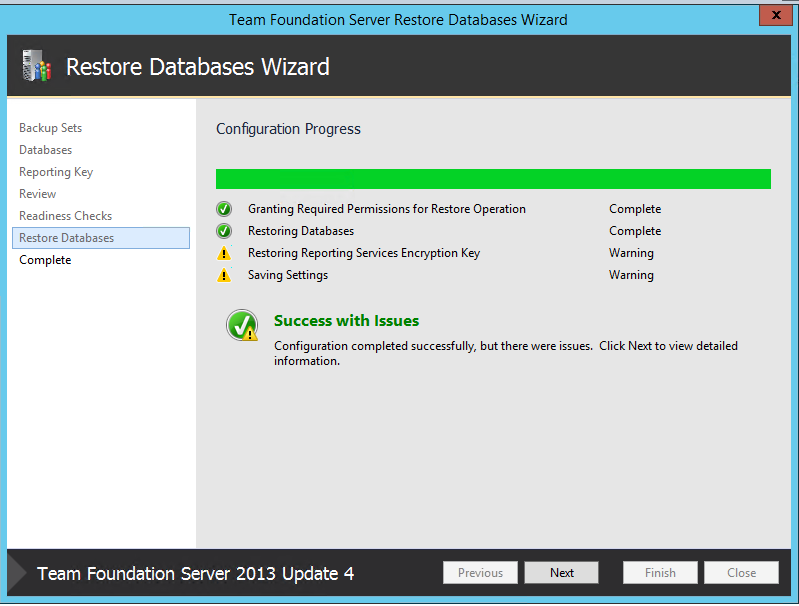
In any case, I decided to go ahead and try performing the Restore based on the outline provided in the article:


As it turns out, I got the last error message because I had stopped the SQL Server Reporting Services service, therefore, the TFS Restore process could not restore the Reporting Services Encryption Key.

In any case, that was easily resolved by going into the Reporting Services Configuration Tool and starting the SQL Server Reporting Service and then subsequently restoring the Reporting Services Encryption Key.


After that was done, I proceeded to restore the Application as advised in the article:


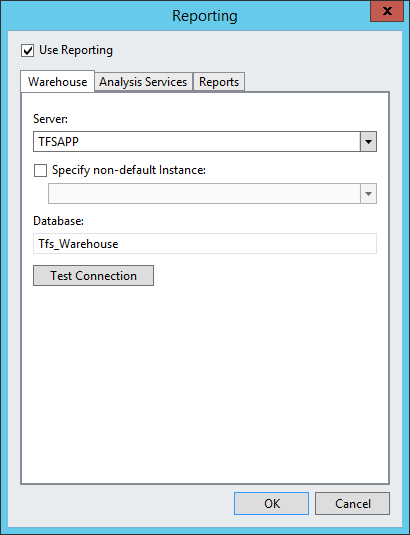
Finally, I went ahead and started fixing up the Urls as was also advised:


Finally, I had to go into Scheduled Backups and disable any old Scheduled Backups.


 That was good enough for me to connect to my new TFS instance using Visual Studio!!

Of course, as a final test, I decided to see what would happen if I tried to do a subsequent restore into TFS after I had completed all of the above steps:

Therefore, if you are planning on doing multiple restores (for example a test restore and a production restore), you will need to delete/drop all of the TFS databases so that there are no issues with the restoration process.

Of course, you will also need to stop the TFS Services in order to be able to delete/drop the TFS databases, which you can accomplish using the following command:

TFSServiceControl quiesce

You can then proceed with the Restore process once more.

This executable is located here:
C:\Program Files\Microsoft Team Foundation Server 12.0\Tools

To restart the TFS Services, you run the following command:

TFSServiceControl unquiesce

You can read more about this command in this MSDN article: https://msdn.microsoft.com/en-us/library/ff470382.aspx


Migrating Active Directory to new hardware in a hosted environment

I recently had a requirement to move our existing Active Directory server to completely brand new hardware.

Unfortunately, we were moving to a hosted environment where support costs a significant amount of money.  Therefore, asking them to have them do the migration for us would be pretty much out of the question.

Therefore, I began to research available options for performing an Active Directory migration.

Well, the first article I came across was this one: https://technet.microsoft.com/en-us/library/cc771290%28v=ws.10%29.aspx

Well, unfortunately, they don't provide much guidance or information specifically on migrating Active Directory to new hardware.  Therefore, I pretty much had to read between the lines and try and figure out what would and would not work.

 Well, I went ahead and tried a System State backup and that would not restore to dissimilar hardware.

The other recommended option was a Full Server Recovery of the Domain Controller: https://technet.microsoft.com/en-us/library/cc772519%28v=ws.10%29.aspx

Unfortunately, it requires access to the underlying Console of the environment as well as the Windows media to perform the recovery.  Neither of these would work in a hosted environment.

The next thing I found was the Active Directory Migration Tool: http://www.microsoft.com/en-us/download/details.aspx?id=19188

https://connect.microsoft.com/site1164/program8540

Unfortunately, it required a SQL Server database and quite a bit of setup time as well as installation on a server outside of the Active Directory environment.

Therefore, I had to start search for solutions that would not require as much setup time and could be done pretty much on our own.

That is when I came across Easeus ToDo Backup Advanced Server/Backup Technician:

http://www.todo-backup.com/business/advanced-server-backup.htm

 http://www.todo-backup.com/business/technician-backup.htm

These tools would allow us to take System Backups from one server and move them to another server without all of the headaches and hassles of the other solutions.

I can simply install Easeus ToDo Backup on the underlying Server OS and after going through a backup on one server, perform a Recovery/Restore on the other server.

 Unfortunately, it seems to require Console Access during the restoration period, so we were forced to do a restoration into a Hyper-V environment that we owned, but perhaps Easeus will soon be able to provide a solution that does not require underlying Console Access, thus making it ideal for hosted environments!!

In any case, after I restored my Domain Controller to the Hyper-V Virtual Machine, I changed the IP Address and DNS Server entries to point to itself.

Everything seemed to be working properly when I attempted to join another server to the domain.

I then encountered this error message: "Cannot complete this function" as described in this article: http://blog.mpecsinc.ca/2013/08/domain-join-error-cannot-complete-this.html

Well, as it turns out, I had migrated only 1 of the Domain Controllers in the Forest.  There were originally 2 DCs in the Forest, so when I attempted to join a domain with 1 of the DCs missing, the error was being thrown!

Therefore, I ended up migrating the 2nd DC in the Forest as well and after making the appropriate IP Address and DNS Server changes, I could then successfully join another server to the domain!  Woo hoo!!


Monday, March 23, 2015

The source files could not be downloaded

I was recently setting up a brand new Windows Server 2012 R2 Server in a hosted environment and I needed to install the .NET Framework v. 3.5 when I suddenly got this error message:


Hmmm.   That was interesting.  I had never encountered this error message before and the server was definitely connected to the Internet!

So, I tried it once again, but this time with PowerShell:


Still the same error message!

Well, I did some investigation, and for whatever reason, the source files could not be retrieved over the Internet which meant that I would have to provide an alternative source file path.

Therefore, I ended up using this PowerShell command instead:

DISM /Online /Enable-Feature /FeatureName:NetFx3 /All /Source:F:\sources\sxs 

That did the trick!


You can also use this alternative PowerShell command:


$SourceDir = "F:\sources\sxs"
Install-WindowsFeature –name NET-Framework-Core –source $SourceDir

Both of these solutions are also documented in this Microsoft support article: https://support.microsoft.com/en-us/kb/2734782